Saturday, February 28, 2015

Side Table/Dog Bed!

I found this cute side table at a yard sale for $5! Yes, $5!!! I immediately thought it would make a cute dog bed! This is what I did!!!


 The first thing I did was give it a good scrubbing with TSP! It was a mess! Then I sanded it down where the wood was peeling. I sprayed it with air using an air compressor. DIY Tip- When painting and sanding furniture, it is a good idea to invest in an air compressor. It ensures you got out all the dust from the piece before sealing it with wax or poly!


Next, I spray painted the metal on the front doors and hardware with black matte spray paint. Following that I mixed up some homemade chalk paint using a ratio of 1/3 calcium carbonate (already mixed with hot water) and 2/3 latex paint. This paint color was Dover Grey. I let the paint dry overnight. The next day, I lightly sanded by hand with 220 grit sand paper. I sealed it with a clear coat of Annie Sloan clear wax, then accented the trim and corners with Annie Sloan dark wax. I buffed with a microfiber rag a few hours later.

As for the dog bedding, I spent $6 on fabric and Velcro and had the rest of the material already. I wanted the new owner to be able to wash the bedding, so using fabric I already had, I stuffed it with batting and sewed it up. I made sure to measure the space inside the cabinet first, so I knew how big to make the bed. Using the new fabric, I made a cover to go over the "bedding". Rather than sewing that up, I used Velcro to close it up. This way you can take the cover off, wash it and put it back on. You could even make new "bedding" if it got soiled.

Here is the final product!


Total spent- Less than $15!!!

Happy Painting!

Thrift find headboards!

These two headboard projects were for my kids. For my son, I found a twin size head and footboard at a yard sale for $10. A neighbor gave us their child's old mattress and box spring. All I needed to do was paint! As for my daughter, she already had her bed set up for months, but we just had it sitting on a metal frame. I found this head and footboard on craigslist for $80 but I talked them down to $50. Here is what I did with both frames!

First, I cleaned both frames with TSP. This is a heavy duty cleaner you can buy at any home improvement store. Using saw horses, I laid out the frame and painted them with Old Town Paints True Black chalk paint. This paint is great and you don't need to sand the piece before using it. I put one heavy coat on first and then thinned out the second coat with water.


I let the paint dry overnight and put two coats of clear Old Town Paints wax on it using a rag. After a few hours, I buffed it with a microfiber rag. That's it!!!! Easy, easy!!!


For my daughter's frame, I was hoping I could do nothing to it, but when I got it home, I noticed the paint had yellowed on the headboard specifically. My daughter loved the design it had, so I knew not to sand that off. I also ran into two problems with the set up. First, her existing bed frame would not attach to the head and foot board. So I recreated side rails similar to my son's (the one in the above picture). I bought 2 boards at Lowe's for $4 total. I sanded them down with 80 grit sandpaper and a palm sander until I had a smooth finish and cut them to size. The second problem was that the frame wasn't as tall as I wanted it to be. So I found "bun feet" at Lowe's for $3 each. I drilled a hole in the bottom of the head and foot boards, put some wood glue inside and set the "bun feet" inside. I let it dry for a few hours.

Without "bun foot".
 With "bun foot".


Next, I painted everything using Old Town Paints Cotton White. I grabbed a few colors in my paint cabinet and my 6 year old daughter and I repainted the design on the head and footboard. It is not perfect but any means, but it means a lot to my daughter since she painted it! I clear waxed with Old Town Paints and buffed it a few hours later.

To attach the side rails, I used 2 L brackets at each corner. First I attached all the L brackets to the side rails. This way when I set it in place, I would know where to pre-drill holes for the screws in the head and foot board. BTW- This is a two person job!!!! Holding up the rail, I pre-drilled a hole the head board then attached it with a screw. I did this for all 8 L brackets. The finished product looks great!


Both beds cost me a total of $90! What a steal!

Happy Painting!

Thursday, February 26, 2015

Black and White Buffet

Found this beautiful buffet on craigslist. It was in excellent condition, just had a horrible faux wood paint job. I love the classic black and white look so that was my inspiration. Here is what I did!

Before picture. If has beautiful detail and lines.


I had to strip off the faux paint on the top. I put paint stripper on that I got from Lowe's in the paint department and let it sit for 10 minutes. Then using a putty knife I scrapped it off. I then used a palm sander and sanded with 60 grit sandpaper. There were so many layers of paint that I had to add stripper again and then sand once more. The whole process took a while! Once all the paint was off, I went over the top with 220 grit sandpaper by hand to create a smooth finish. I highly recommend you do that every time!!!!


I cleaned the piece well with TSP and made sure before I stained the top to wipe it down with water to open up the wood pores. DIY Tip- Use water or wood conditioner on wood before you stain it!
I stained the top with ebony wood stain (which is black). I put 2 layers of ebony on. Letting it dry for 2 hours between layers. I painted the body with Annie Sloan Pure White. The hardware was spray painted black. I let it dry overnight.


DIY Tip- Make sure the stain is completely dry before moving on. Dry times can vary depending on weather, ventilation in the space you are working and freshness of the can of stain you are using. You should not be staining or painting in 55 degrees or colder weather.  Take the piece inside if needed. Nor should you be using an old can of stain. Buy smaller cans of stain if you don't paint often!

The piece was dry so I lightly sanded it with 120 grit sandpaper. I didn't want a heavy distressed look so I took it easy on the sanding! I put two coats of with Annie Sloan clear wax on the base. It is best to put on a layer of wax with a rag or a cheap brush and then lightly wipe it off. Let it sit for 5 to 6 hours or even overnight. Then put another coat on and lightly wiping off excess wax. Buff it with a microfiber rag the next day. I put two coats of polyurethane on the top to protect the ebony finish. For poly I use a Wooster 3 inch brush. Read the directions before using poly. DIY Tip for poly- Once you brush the poly on, don't go back and mess with it!!! You will ruin your piece. Poly will level itself out!

Here is the final pictures!


The person who bought this gorgeous piece from me sent me pictures of it in her house. I think it looks stunning!


 Happy Painting:)


Tuesday, February 24, 2015

Teal Antique Buffet

This is a quick tutorial of how to refinish a 100 year old antique buffet. Many of us love the look of old pieces mixed with modern touches. This is a perfect example of it! This buffet was custom painted for a client who was going to use it as a entertainment center for her television. The wood grain was beautiful in this piece, so we worked around it with the pop of teal. Here is what I did!

This is the piece I found on craigslist for my client.


First I sanded down the top with 120 grit sandpaper using a palm sander. Many old pieces have layers of old varnish that you need to get up. I sanded the drawers by hand.


With 100 year old pieces, the wood is very delicate, so be careful sanding. By hand, I lightly sanded over the top with 400 grit paper to make sure it was nice and smooth.
DIY tip- If the varnish or wood peels up, get an iron and towel. Lay the towel over the wood and iron on cotton hot. The varnish will lay back down. You can then use wood glue and wood filler if you need to.

Then I wet the top with a wet rag of water to open up the wood pores. Since I did this piece, I have found a wood conditioner from Walmart that I love called Minwax Pre-stain wood conditioner. You wipe it on with a rag and let it sit for 15 min. before staining. This allows the wood pores to open and the wood stain absorbs more evenly. If you don't do this, YOU RISK HAVING A BLOTHCY LOOKING WOOD FINISH!

I stained the top and drawers with minwax walnut stain. Make sure your can is fresh!! Old stain will come out blotchy, even if you use a wood conditioner first.


I took off the doors to repair one of them with some wood glue and clamps. I let it dry overnight.

I painted the body and doors in a homemade chalk paint mix. I used Lowe's flat teal paint along with calcium carbonate.
DIY tip- If you are not chalk painting regularly, I recommend you buy already made chalk paint!! It is less hassle.

After I painted the body, I let it dry overnight. Most chalk paint companies say you can distress in 30 minutes after painting. I like for the paint to stick to the piece overnight.


Now for the detailing part!!!

I lightly distressed it using 120 grit sand paper. Then I clear waxed and dark waxed using Old Town Paints waxes.

I put 2 coats of oil based polyurethane on the wood to protect it from scratches. Water-based poly is just as good, but you need 3-4 coats to get the protection you want.
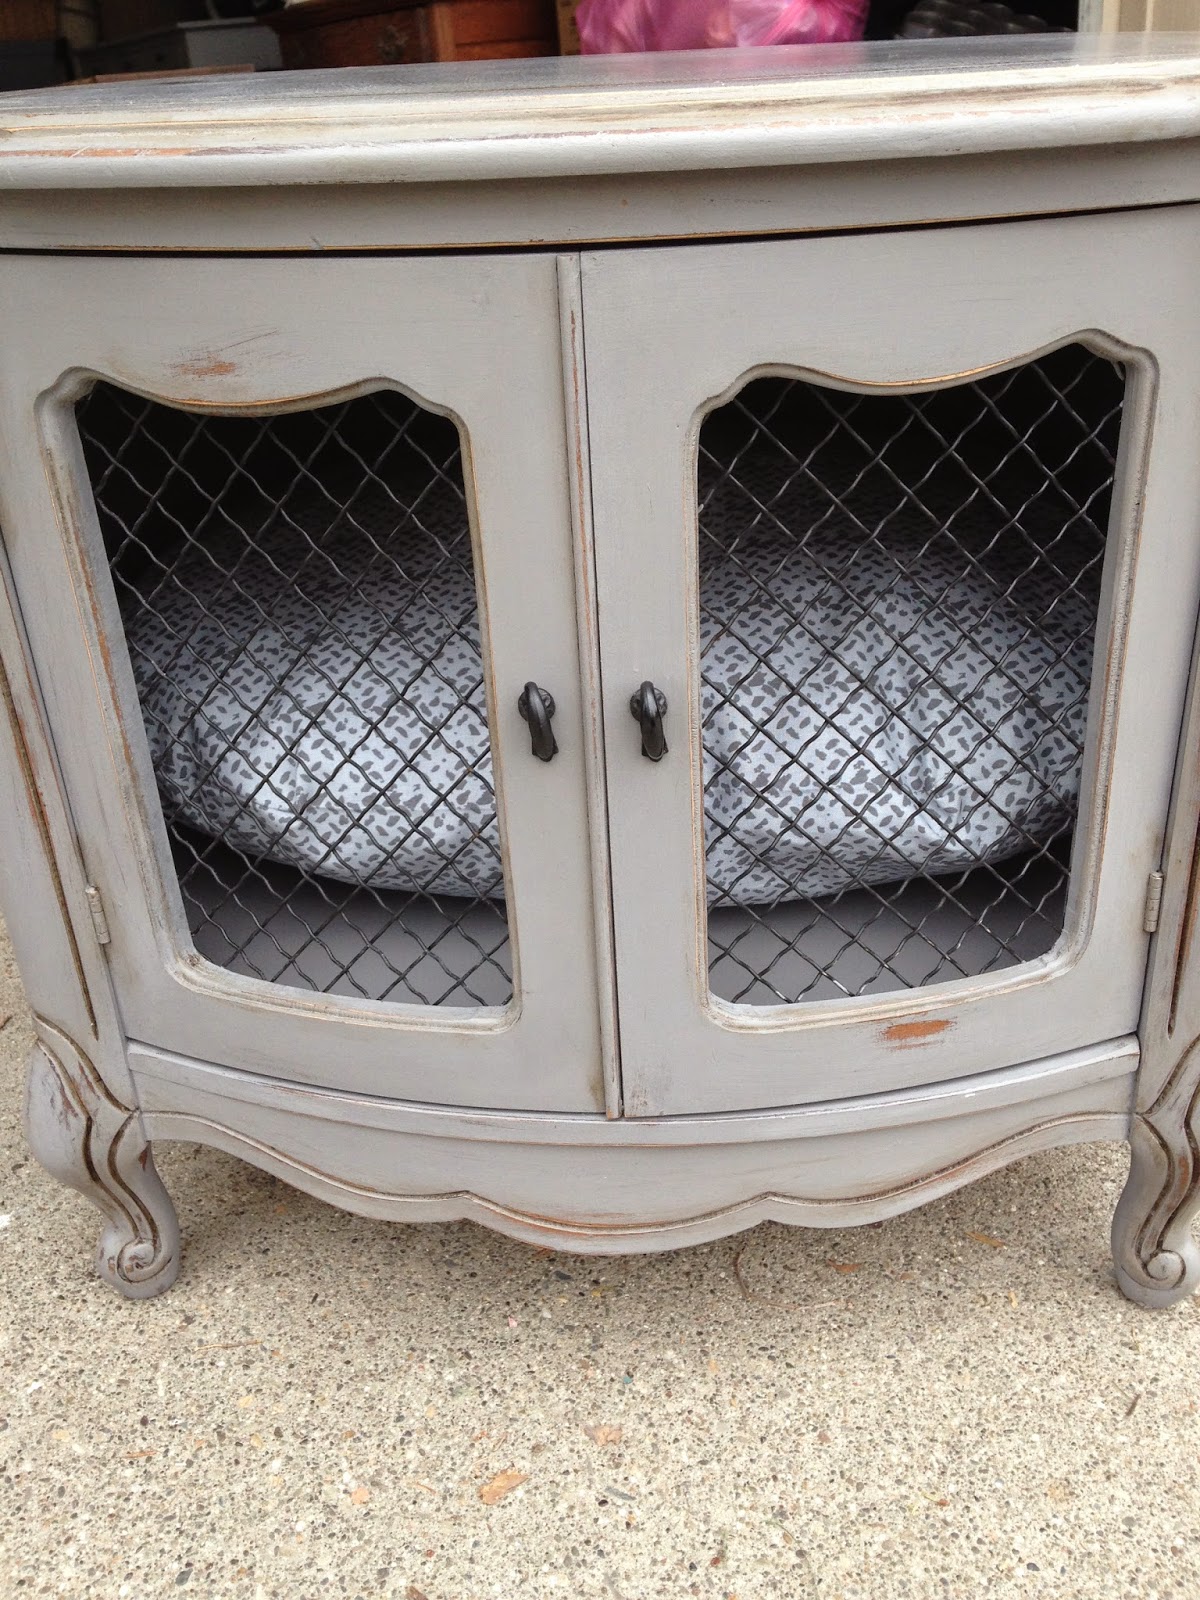
Final product!


Last DIY tip- Take it slow. Refinishing furniture should not be rushed. You can tell pieces that gets lots of love, from rushed pieces!!! Beauty takes time:)

Happy Painting!